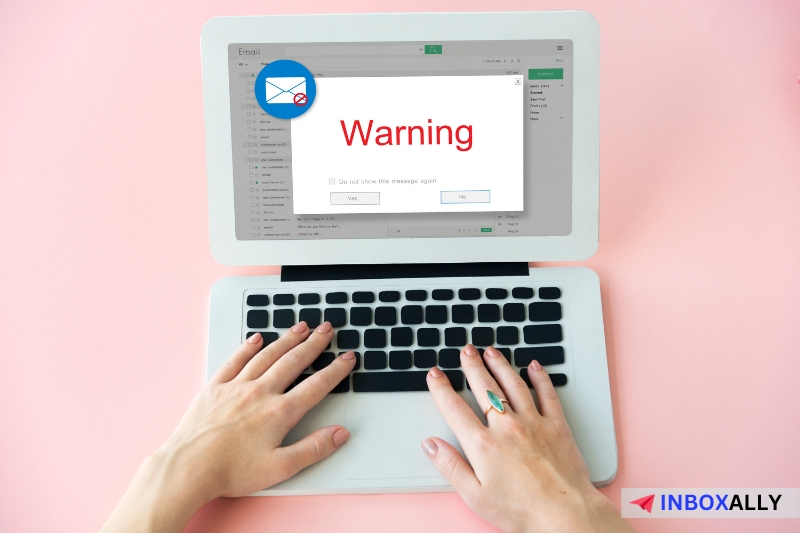
Então, você está prestes a enviar seu conteúdo de marketing por e-mail para seus destinatários-alvo. Depois de clicar em enviar, seu e-mail é rejeitado e mostra um relatório de não entrega (NDR) com a mensagem ” 550 5.4.1. Recipient address rejected: access denied “. Vários fatores, inclusive a configuração incorreta do DNS e a baixa reputação do remetente em seu servidor, podem causar esse erro comum de entrega de e-mail. Este guia explicará em detalhes o erro 5.4.1 Endereço do destinatário rejeitado: Access denied error, suas causas comuns e quatro correções fáceis de fazer, fornecendo tudo o que você precisa saber para resolver esse problema em suas contas de e-mail. Continue lendo para saber mais.
O que é o código de erro 550 5.4.1?
O erro 550 5.4.1 é um código de erro do protocolo de transferência de correio eletrônico simples (SMTP). Quando você envia um e-mail, ele passa por vários servidores de e-mail antes de chegar ao endereço de e-mail do destinatário. Quando qualquer um desses servidores encontra um problema, como o código de erro 550 5.4.1, é provável que haja um problema com o servidor de e-mail do destinatário. O código de erro “550” significa que o servidor de e-mail do destinatário rejeitou sua mensagem, fazendo com que ela fosse devolvida. Enquanto isso, o código “5.4.1” no relatório de não entrega (NDR) indica um problema com o servidor de e-mail do destinatário ou que o destinatário bloqueou você.
Causas comuns de 5.4.1. Endereço do destinatário rejeitado: Mensagem de erro de acesso negado
#1. Invalid Email Address
Esse erro pode aparecer se o endereço de e-mail não existir no servidor de e-mail do destinatário. Como os provedores de e-mail não podem entregar e-mails a usuários com caixas de correio inexistentes, o envio para um endereço inválido fará com que sua mensagem seja bloqueada, causando o erro 5.4.1 Endereço do destinatário rejeitado. Se você estiver enviando um e-mail para um endereço inválido do Outlook ou para domínios inexistentes no Azure Active Directory (para usuários do Microsoft Exchange Online), seu e-mail poderá ser rejeitado usando o DBEB (Directory-Based Edge Blocking), mostrando o erro 550 5.4.1 recipient address rejected.
#2. Misconfigured Domain Name System (DNS) Settings
As configurações de DNS corretamente definidas são essenciais para uma comunicação de e-mail perfeita. Isso inclui verificar o registro MX (mail exchange) e outros registros necessários para autenticação de e-mail para evitar spam, como DKIM, SPF e DMARC.
#3. The Recipient has Blocked Your Email Domain
Se você não seguir as práticas recomendadas de envio e incluir conteúdo com spam para os destinatários, é provável que seus e-mails sejam bloqueados por um destinatário específico, o que levará ao 5.4.1. Erro de endereço do destinatário. Para saber mais sobre sua pontuação de spam e saber o que é necessário para evitar a pasta de spam, use nosso Email Spam Checker gratuito.
#4. You’ve Been Blacklisted by the Recipient’s Email Service Provider (ESP)
Se o seu IP ou domínio for frequentemente associado a spam por servidores de e-mail, há uma grande chance de o ESP ter colocado o seu IP ou domínio na lista negra. Ao enviar e-mails nessa situação, você receberá o erro de endereço do destinatário 550 5.4.1 e outros códigos de erro 550. Se você estiver enviando e-mails em massa, também é comum receber esse erro quando não estiver seguindo as diretrizes ideais de envio de e-mails em massa fornecidas pelo seu ESP (por exemplo, Gmail e Outlook). Para saber o cronograma de aumento ideal para suas campanhas, consulte nosso guia de cronograma de aumento de e-mails.
4 Correções efetivas para 550 5.4.1 Endereço do destinatário rejeitado: Erro de acesso negado
Aqui estão algumas correções simples para o erro 5.4.1 Endereço do destinatário rejeitado para que seus e-mails cheguem aos destinatários corretamente:
Correção nº 1: verifique o endereço de e-mail do destinatário
Uma das etapas mais importantes para solucionar esse erro é garantir que o endereço do destinatário seja válido e correto. Verifique novamente se há erros de digitação no nome de usuário, no servidor de e-mail e na extensão do e-mail. Para saber mais, leia nosso guia sobre como verificar se um endereço de e-mail ainda é válido e está ativo.
No entanto, se você for um profissional de marketing por e-mail que apresenta esse erro em vários endereços da sua lista de e-mails, poderá usar um serviço de verificação de e-mail para agilizar o processo.
Observação: Garanta que seus e-mails cheguem à caixa de entrada correta com a verificação da lista de e-mails da InboxAlly! Nosso serviço remove duplicatas e e-mails inválidos de sua lista, reduzindo as taxas de rejeição e melhorando a capacidade de entrega de e-mails. Comece a usar o InboxAlly hoje mesmo para obter taxas de abertura mais altas e posicionamento consistente na caixa de entrada!
Correção nº 2: verifique se os registros DNS estão configurados corretamente
Verificar se os registros de DNS estão corretos é necessário para manter uma boa reputação de remetente. Você pode começar verificando os registros Mail Exchange (MX) e Sender Policy Framework (SPF) do seu domínio. Vamos nos concentrar nos domínios do Google Workspace e do Exchange Online (o processo pode variar dependendo do seu provedor de hospedagem de e-mail):
Verificação de registros MX
No Google Workspace
- Faça login na sua conta do console do Google Admin.
- Em seguida, selecione o ícone Menu e vá para Apps > Google Workspace > Gmail. Clique em Configurar.
- Se você começou a usar o serviço em 2023 ou depois, deve ter apenas um registro MX: SMTP.GOOGLE.COM.
No Exchange Online No site do seu provedor de hospedagem, crie um novo registro MX. Certifique-se de que os campos estejam definidos com os seguintes valores:
- Tipo de registro: MX
- Prioridade: Defina como o valor mais alto disponível, normalmente 0.
- Nome do host: @
- Pontos para o endereço: Copie o valor do centro de administração e cole-o aqui. (Por exemplo, se o seu nome de domínio for domain.com, o valor será domain.com.mail.protection.outlook.com)
- TTL: 3600
Verificação de registros SPF
Para verificar se os registros SPF estão definidos corretamente, você pode seguir o guia de configuração de SPF do Google e o artigo de ajuda da Microsoft para obter etapas detalhadas.
Correção nº 3: verifique a configuração do servidor SMTP
Outra maneira de solucionar o erro 500 5.4.1 Endereço do destinatário rejeitado é verificar se as configurações de SMTP estão definidas corretamente. Para fazer isso no Google Workspace e no Outlook, siga as etapas abaixo:
No Google Workspace
1. Faça login na sua conta do Gmail. 2. Clique no ícone Configurações e vá para a guia Encaminhamento de POP/IMAP. 3. Em Servidor de saída (SMTP), verifique se os seguintes valores estão configurados:
- Endereço do servidor SMTP do Gmail: smtp.gmail.com
- Nome SMTP do Gmail: insira seu nome aqui
- Nome de usuário SMTP do Gmail: insira seu endereço do Gmail aqui
- Senha SMTP do Gmail: Insira sua senha do Gmail aqui
- Porta SMTP do Gmail (TLS): 587
- Porta SMTP do Gmail (SSL): 465
4. Selecione Salvar alterações.
No Outlook
1. Abra o aplicativo Outlook para desktop e faça login na sua conta. 2. Vá para Arquivo > Info. No menu suspenso Account Settings (Configurações da conta ), selecione Manage Profiles (Gerenciar perfis). 3. Clique no botão Contas de e-mail. Escolha sua conta de e-mail e selecione Change (Alterar). 4. Na janela seguinte, selecione Mais configurações. Na janela Configurações de e-mail da Internet, navegue até a guia Servidor de saída. 5. Marque a caixa de seleção Meu servidor de saída (SMTP) requer autenticação e selecione a opção Fazer logon usando…. Insira seu endereço de e-mail e a senha da conta Microsoft nos campos a seguir. 6. Em seguida, vá para a guia Advanced (Avançado ) e verifique se os seguintes valores foram inseridos:
- Endereço do servidor: smtp-mail.outlook.com (para usuários do Outlook)
- Porta IMAP: 993
- Servidor de saída (SMTP): 465
- Criptografia IMAP: SSL/TLS
7. Selecione OK.
Correção nº 4: exclua seu IP ou domínio do ESP do destinatário
Se o seu e-mail tiver sido colocado na lista negra pelos provedores de e-mail por spam ou outros motivos, você poderá solicitar uma solicitação de remoção preenchendo o formulário de contato do Bulk Sender. No Outlook, acesse a página da Web do Portal Anti-Spam Delist e preencha todas as informações necessárias. Certifique-se de usar o mesmo endereço de e-mail em que você recebeu o erro 550. Para evitar problemas com o envio em massa, você pode se familiarizar com as Diretrizes para remetentes de e-mail do Google e com o Guia de suporte ao remetente da Microsoft. Se você conhece pessoalmente o destinatário do Outlook, também pode pedir que ele adicione seu e-mail à lista de remetentes seguros para garantir que seus e-mails sempre cheguem à caixa de entrada principal dele.
Observação: Acelere a capacidade de entrega de seus e-mails com o InboxAlly! Nosso serviço de aquecimento de e-mail ajuda você a criar uma reputação sólida para seu IP e domínio mais rápido do que nunca. Seguindo um cronograma de aquecimento adequado e aproveitando nossos e-mails semente para engajamento, você pode ganhar rapidamente a confiança dos provedores de caixa de correio. Com o InboxAlly, você pode começar sua jornada para melhorar o posicionamento na caixa de entrada e as taxas de abertura hoje mesmo!
Considerações finais
Se você receber e-mails devolvidos por erros de entrega de e-mail, como o erro 550 5.4.1 Endereço do destinatário rejeitado: O erro de acesso negado pode ser desafiador e diminuir a reputação do remetente. No entanto, você pode resolvê-lo verificando seus registros de DNS e configurações de SMTP, verificando o endereço do destinatário e pedindo para ser retirado da lista negra de um ESP. Outra maneira eficaz de evitar erros “550” e aumentar o sucesso de sua campanha de divulgação é usar uma ferramenta confiável de capacidade de entrega de e-mail, como o InboxAlly. Nossa plataforma oferece uma ferramenta de verificação de lista de e-mails, ajudando você a remover e-mails inválidos e duplicados da sua lista de e-mails. Isso resulta em taxas de rejeição mais baixas e melhor capacidade de entrega de e-mails.
Experimente resultados mais rápidos com o InboxAlly! Em apenas duas semanas, você pode observar uma melhora significativa na capacidade de entrega e nas taxas de abertura de seus e-mails. Alguns clientes até relataram que dobraram suas taxas de abertura nesse período. Comece a usar o InboxAlly hoje mesmo e veja suas campanhas de e-mail prosperarem com melhor engajamento e maior receita.


